How to Create a Stunning Layering Bulb Garden

Have you every tried a layering bulb garden?
Can you imagine planting your flowers in such a way that you get to enjoy a new flower pop up every few weeks all summer long? Think of it as each part of summer as singing a new note and a new flower comes dancing up from the ground with perfect timing.
 This can happen when you choose to layer your perennial flower bulbs. While daffodils and tulips might be the first flowers that come to mind when you think spring flowers, there is so much more that can be done.
By using this concept called, “layering bulbs” also referred to as, “bulb lasagna,” you can accomplish a stunning flower garden that you will enjoy all summer long.
With just a few tips, you can do this on your own and have a stunning flower garden to enjoy from early spring all the way through to August or beyond. Here is a step-by-step tutorial to help you accomplish this amazing garden trick.
7 Steps to Create a Layering Bulb Garden
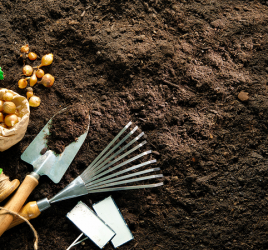
Step 1 – Choosing your Bulbs: The Four Main Layers
When choosing your flower bulbs, we have found it helpful to use the four main layers that was provided by Garden Forever. Built into this layering system is already the timing in which each of these flowers will bloom. At the bottom you will see the Musari flowers which will be the ones that bloom in very early spring. The last layer being flowers you will see in August and the middle two layers blooming between those times. These bulbs can be bought at your nearest flower nursery.
Layer 4: Lilium – Includes Asiatic, Trumpet and Oriental flowers
- Layer 3: Narcissi and Allium
- Layer 2: Tulips
- Layer 1: Muscari – This includes scilla, iris reticulara, Crocus. These are the smallest and the earliest blooming blub
If you are not familiar with some of these flowers, take some time to research them and see which ones you might like best. Daffodils and tulips get lots of attention for spring flowers, but there are many more options to choose from.
Step 2 – Determine Quantities and Row
Determining how many flowering bulbs to put in can feel tricky, but do not dismay, you can do this. Depending on how you are planning on planting your layering bulb garden, will help to answer this for you. There are a few different options for planting.
You can use a container method, plant a hole in the ground, or a row. For example, if you have a hole of about 18 inches wide, you could put about 4-5 lilies, 3-5 daffodils, 5-7 tulips, and about 20 or so small bulbs.
The size of the bulb will matter. The general rule of thought is the bigger the bulb the bigger the bloom. So, if you are noticing that you have 5 large daffodil bulbs, you might want to put in just three. If you are choosing a 10-inch container, then you most likely will only have room for two layers of bulbs. For three layers, you can use a 14-inch container.
Step 3 – Choosing Colors
Remember that these bulbs will not all be coming up at the same time. So, you could choose a different color for each layer, or maybe two colors for each layer. You might want to avoid putting a bunch of different colors in one layer as it might not have the continuity that is pleasing to the eye.
Step 4 – Choose Your Spot
You can choose to layer your bulbs in a container or directly into a hole, or in a long line. Whatever you choose, make sure to measure the space and choose the amount of layers and bulbs based on how much space you have.
Step 5 – Begin with Gravel
At the bottom of your container or your hole, place a layer of gravel.
Step 6 – Add Dirt
Add a layer of potted soil or good composted dirt over the gravel.
Step 7 – Place Your First Bulbs and Continue Layering
Add your first level of bulbs and cover with the bulbs with dirt. Continue this process of adding bulbs and then dirt. This is where the “bulb lasagna” comes in as the actions are similar if you have ever made a lasagna.
Step 8 – Water
Water the area thoroughly and make sure it is receiving adequate water throughout the season.
Step 9 – Let The Flowers Die Back
One tempting action will be to pull off the debris once you see your flowers begin to die off. You want to let nature run its course and let the flowers die off themselves. This is how your bulbs will rejuvenate themselves for the next year.
Helpful Garden Tool
One way to make sure that your bulbs receive enough water is by installing a simple tool called the Root Stick. This is a tool that has proven to profoundly impact the life of plants, trees, flowers, and scrubs.
A Root Stick is a device that you insert into the ground directly by your plants. It acts as a straw that allows you to water your plants and hit directly at the root system. In this case, your bulbs will be able to receive direct irrigation. This gives the roots the energy they need to grow deep, well established roots.
Root Sticks provide oxygen directly to the root and helps to create healthy and flourishing plants. The best part is these are a proven system that is not going to break the bank. For just $19.99 you get a package of 10 Root Sticks. If you are looking to help your other plants and trees, Rootwell Products, Inc. has products to help all over your garden.
Enjoy Flowers from Spring to Late Summer
Creating a layering bulbs garden is a great choice if you are limited on space. However, it is also a great option if you just want to have constant blooming flowers from early spring to late summer. You can choose to a spot directly in your garden, or choose to place your bulbs in a container. Regardless, you are sure to be amazed when every couple of weeks you get to witness stunning flowers coming peeking through.
Over to You
If you have ever created a layered bulb garden, do you have any tips to add? Or, if you haven’t, would you like to try it? Please let us know in the comments below.
You may also like to read: